
Android TV is a powerful platform that offers a range of features and services to enhance your entertainment experience. From streaming your favorite shows and movies to playing games and accessing various apps, Android TV has something for everyone. However, to enjoy the latest features and security updates, it’s essential to keep your Android TV up to date. In this article, we’ll guide you through the process of updating your Android TV, so you can enjoy the latest features and stay protected from security threats.
Step 1: Check for Updates
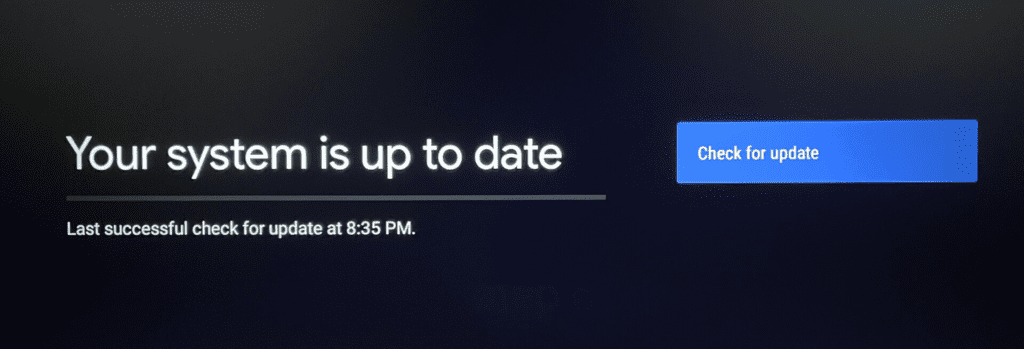
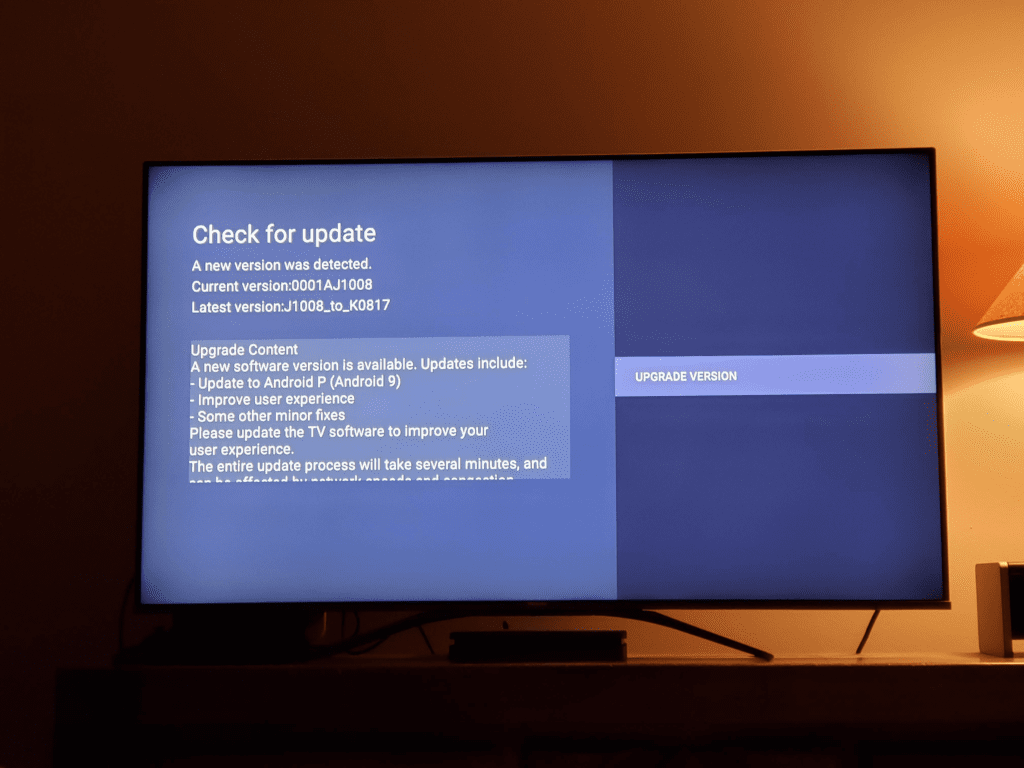
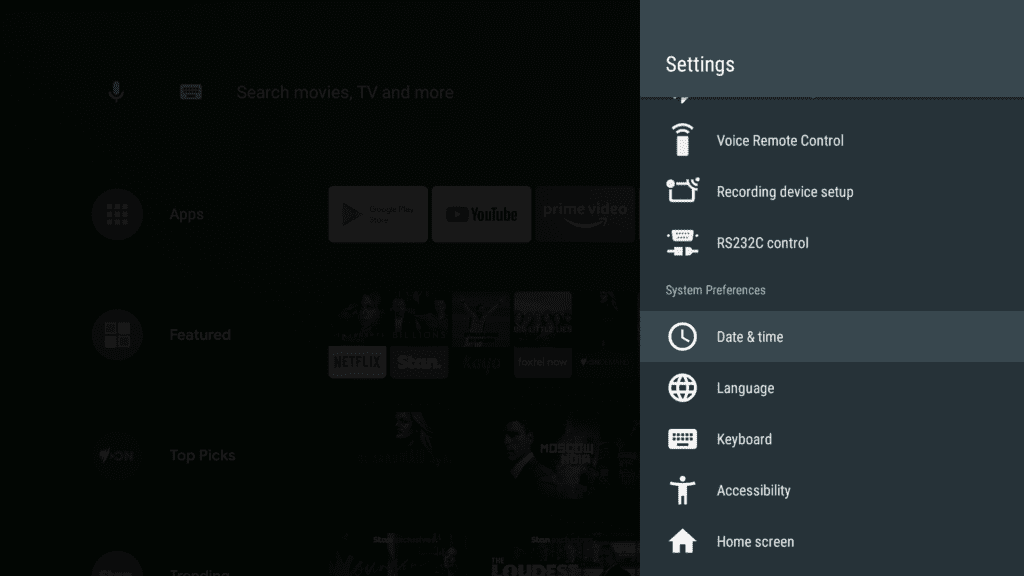
The first step to updating your Android TV is to check if there are any available updates. To do this, go to the “Settings” option on your Android TV, and then select “System.” Next, choose “System Update” to check for available updates. If an update is available, you’ll see a notification that prompts you to download and install the update. If your Android TV is already up to date, you’ll see a message stating that your system is up to date.
Step 2: Download the Update
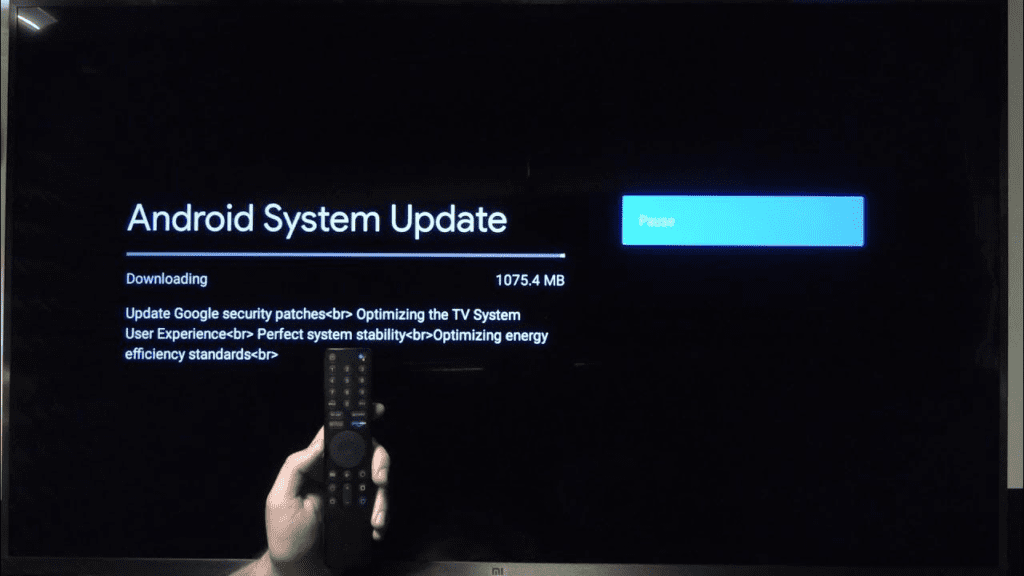
If there’s an update available, click on the “Download” button to start the process. Make sure that your Android TV is connected to the internet and has sufficient storage space to download the update. The size of the update may vary depending on the update file size and the version of Android TV you’re using.
Step 3: Install the Update
Once the download is complete, the installation process will begin automatically. During the installation process, your Android TV may restart several times. Make sure not to turn off your Android TV or disconnect it from the internet during the installation process. Doing so may cause damage to your Android TV, and you may need to perform a factory reset to restore your Android TV to its original state.
Step 4: Check for New Features
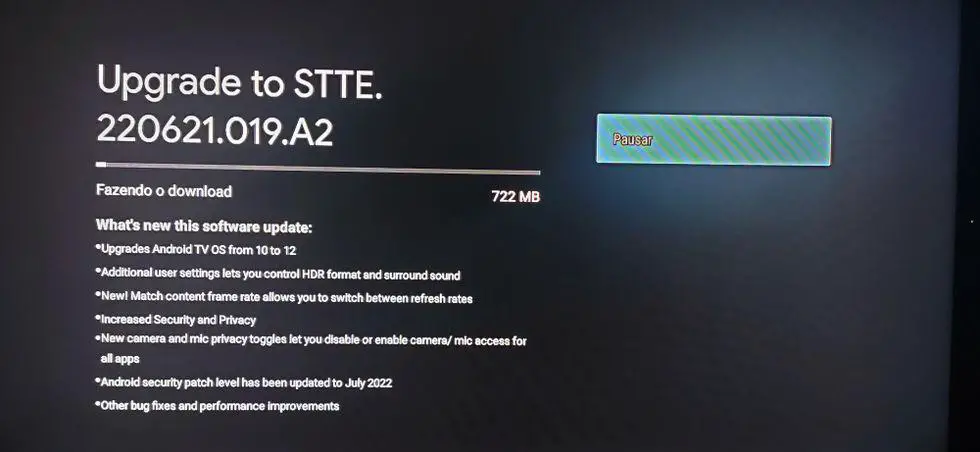
After the installation is complete, check your Android TV for new features that the update may have introduced. For example, the update may have added new streaming services or improved the performance of your Android TV. You can check for new features by exploring your Android TV’s settings, or by checking the release notes for the update.
Step 5: Troubleshooting
If you encounter any issues during the update process, there are a few troubleshooting steps you can take. First, make sure that your Android TV is connected to the internet and has a stable connection. A weak or unstable internet connection may cause the update to fail or take longer than usual. Second, make sure that your Android TV has sufficient storage space for the update. If your Android TV doesn’t have enough storage space, the update may fail or cause issues. Finally, if you’re still experiencing issues, you can try resetting your Android TV to its factory settings. This will erase all your data and settings, but it may resolve any issues that are preventing the update from completing successfully.
In conclusion, updating your Android TV is a crucial step in keeping your entertainment system up-to-date and secure. By following these simple steps, you can ensure that your Android TV is always running the latest software and has access to the latest features and services. Remember to always check for updates regularly and to download and install any available updates as soon as possible. This will ensure that your Android TV is always up-to-date and protected from security threats.
Always Keep Your Android TV Up-To-Date. Here’s Why.
Keeping your Android TV updated is important for several reasons. It ensures that your TV has the latest security patches and features, which protects it from potential security threats and enhances your viewing experience.
Updates also improve the overall performance and stability of your Android TV, ensuring that it runs smoothly and efficiently. Additionally, updated software ensures that your Android TV is compatible with the latest streaming services and apps, allowing you to enjoy the latest content and features. Therefore, it’s essential to keep your Android TV updated to ensure the best possible viewing experience and security.